We developed ourselves an integration module ISPlicense and a popular WHMCS billing.
Using that module, our partners can offer their clients many ISPlicense services directly from the billing. In the first version the module supports ISPsystem software reselling. Other products and SSL certificates will be soon added as we are developing the module now.
Please contact our support to get actual whmcs module.
Module installation guide:
One should install IonCube s on the server to have the right module operation
- Extract archive into the root directory of your WHMCS installation.
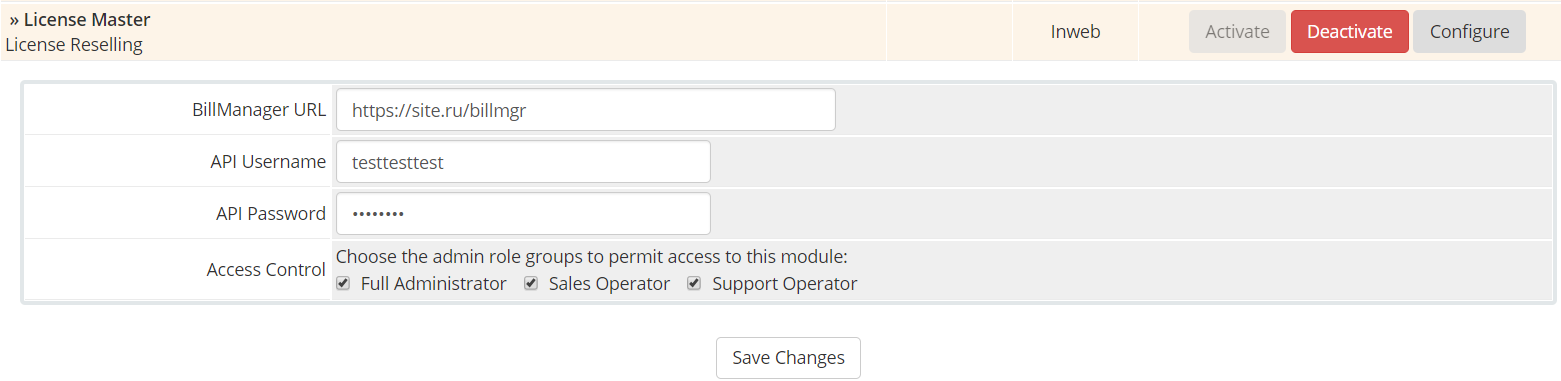
- Within admin area go to Setup -> Addon Modules, select License Master and press “Activate” button. After that you have to configure addon by adding BillManager URL and login/password of BillManager which will be used for all module operations.
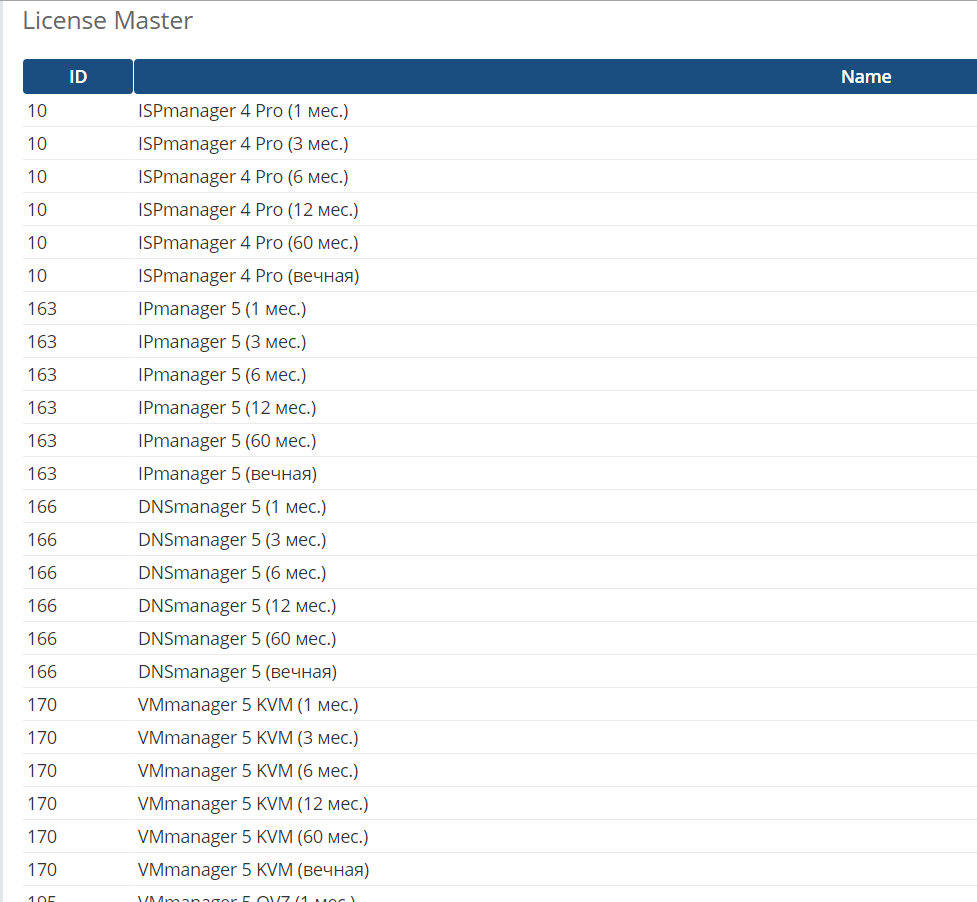
- Within admin area go to Addons -> License Master. Choose “Sync Products” link. After that wait for a bit for system to load all actual products (licenses) within WHMCS.
- Now you have to add (edit, if exists) products. You can choose desired product and period in this section: Setup -> Product/Services. Go to tab “Modules Settings” and choose “License Master”. After that you have to enter info from section 2 of this document. Finally, select desired product from dropdown. Press “Save Changes” button.

After that, module will automatically create all required custom fields for the product.
- If you managed to do 4 above steps – modules is ready to use.

Module allows you to get additional information about licenses from BillManager, such as: user id, license id, license name, license key. If you want to retrieve this information you have to choose appropriate user within WHMCS admin interface, after that you have to choose correct product ordered by user, and after that you will see button “Update product from BillManager” – click it.
- From this screen you can also update license IP or license name. You have to enter new data in appropriate fields and click “Save Changes” button. After that don’t forget that you have to click “Update product from BillManager” for data to be stored within BillManager.
We are pleased to get any remarks and comments for the module. You can also send any questions to our technical support through the ticket system.
 Eng
Eng